In WordPress, you can easily customize the page by editing the page.php file of the active theme. But the change will affect all pages where no need for customization.
You can avoid this by creating a custom page template.
Using this you can design different-different layouts for the pages and add extra content to them without affecting regular pages on the site.
In this tutorial, I show how you can create custom template and add it to the page in WordPress.

Contents
- Create a Child Theme for Customization
- Create Template File
- Create a Page and Apply created custom Template
- Conclusion
1. Create a Child Theme for Customization
Creating a child theme is the first step to creating a custom page template for your WordPress website. A child theme allows you to make changes to the existing source code of your WordPress site without overwriting the existing files. This means you can customize and save any changes you make to your page template, safe in the knowledge that it won’t interfere with other parts of your website.
If you have created the theme on your own then it’s up to you whether you want to create a child theme or not. If you don’t want then skip to the next step.
For example, purpose I am creating a child theme of generatepress theme.
- Navigate to
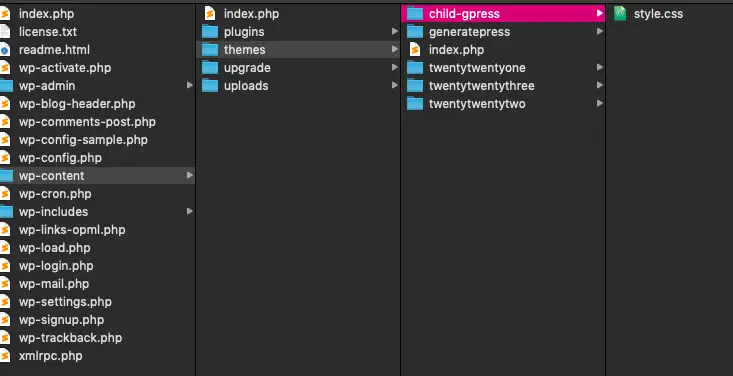
wp-content/themes/and createchild-gpressfolder. - In the
child-gpressfolder createstyle.cssfile.
- Open
style.cssand add the following –
/*
Theme Name: GeneratePress Child
Description: Child theme for GeneratePress
Author: Yogesh singh
Template: generatepress
*/
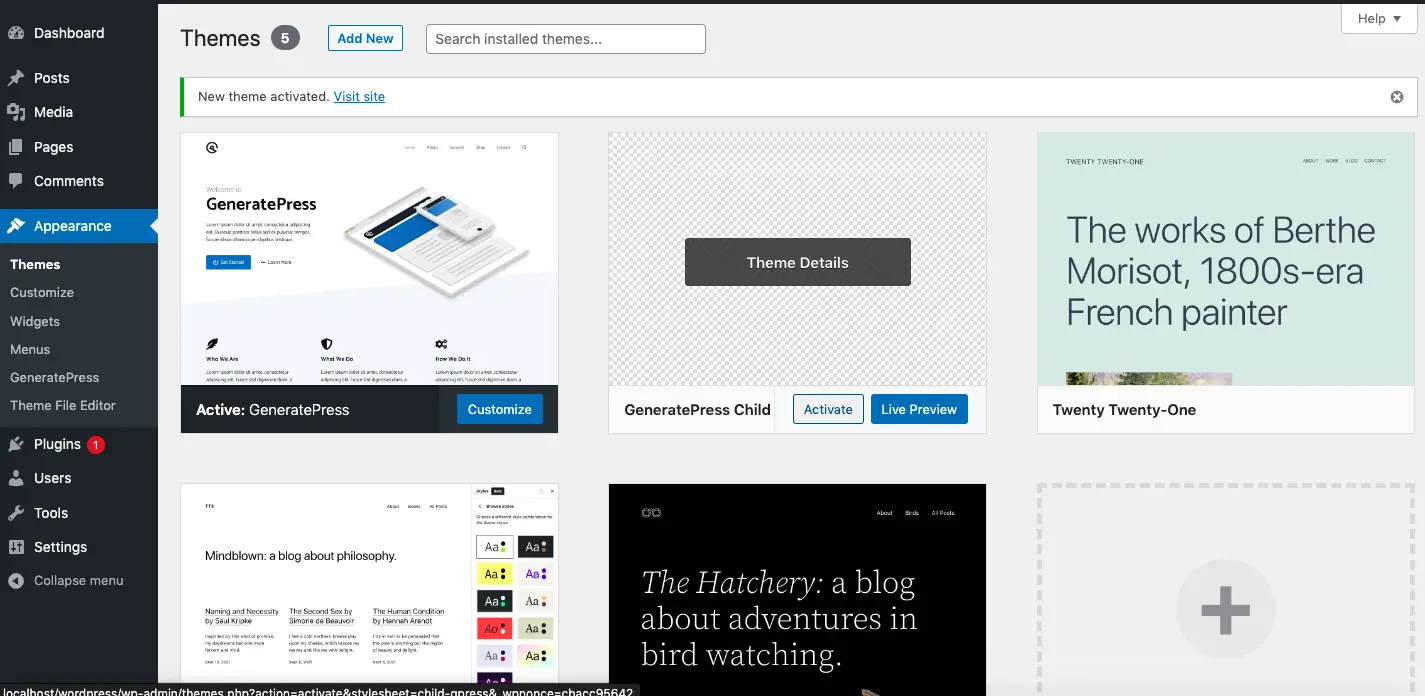
- Save the file and login to your WordPress Admin dashboard and navigate to Appearance->Themes.
- Activate the GeneratePress Child theme.
2. Create Template file
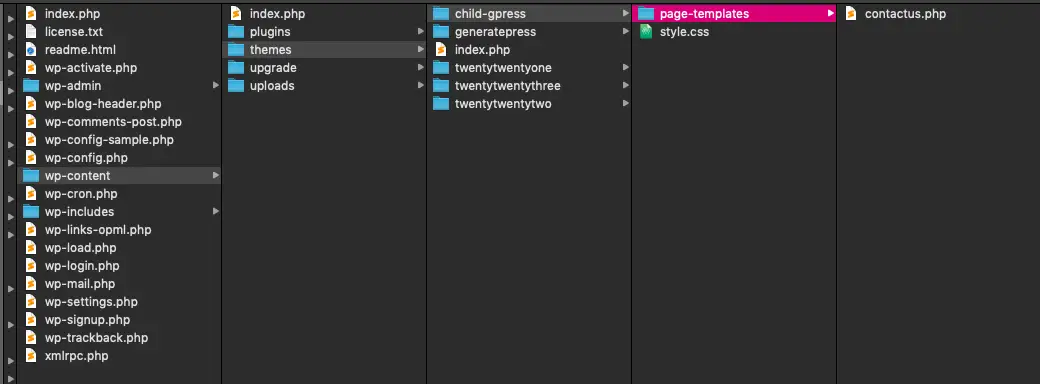
- Navigate to your active theme folder e.g. – child-gpress.
- Here, create a folder
page-templatesto store template files. - Create a
contactus.phpfile insidepage-templates/folder. You can rename the filename to something meaningful.
- Open
contactus.php.
Add code
To tell WordPress that this file is a template file by adding the following code at the top and save it. Now the following template name is visible on the WordPress Dashboard page template section.
<?php

/* Template Name: Contact page Template */
Add some more code and create a contact form.
Completed Code
<?php
/* Template Name: Contact page Template */

get_header(); ?>

<style>

input[type=text], textarea {
  width: 100%;
  padding: 12px;
  border: 1px solid #ccc;
  margin-top: 6px;
  margin-bottom: 16px;
  resize: vertical;
}

input[type=submit] {
  background-color: #007eff;
  color: white;
  padding: 12px 20px;
  border: none;
  border-radius: 4px;
  cursor: pointer;
}

.container {
  border-radius: 5px;
  background-color: #f2f2f2;
  padding: 20px;
}
</style>

<div class="wrap">

  <h3>Contact Us</h3>

  <div class="container">
    <form action="">
      <label for="fname">First Name</label>
      <input type="text" id="fname" name="firstname" placeholder="Your name..">

      <label for="lname">Last Name</label>
      <input type="text" id="lname" name="lastname" placeholder="Your last name..">

      <label for="subject">Subject</label>
      <textarea id="subject" name="subject" placeholder="Write something.." style="height:200px"></textarea>

      <input type="submit" value="Submit">
    </form>
  </div>

</div><!-- wrap -->

<?php
get_sidebar();
get_footer();
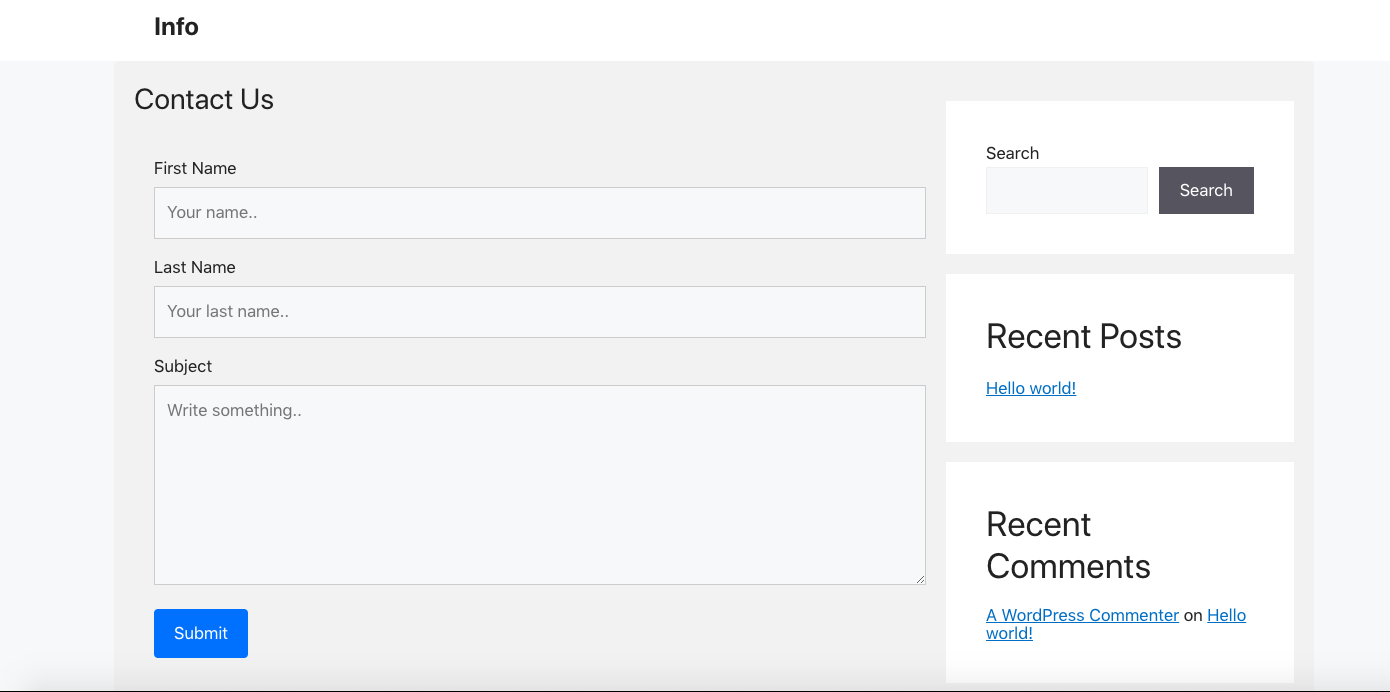
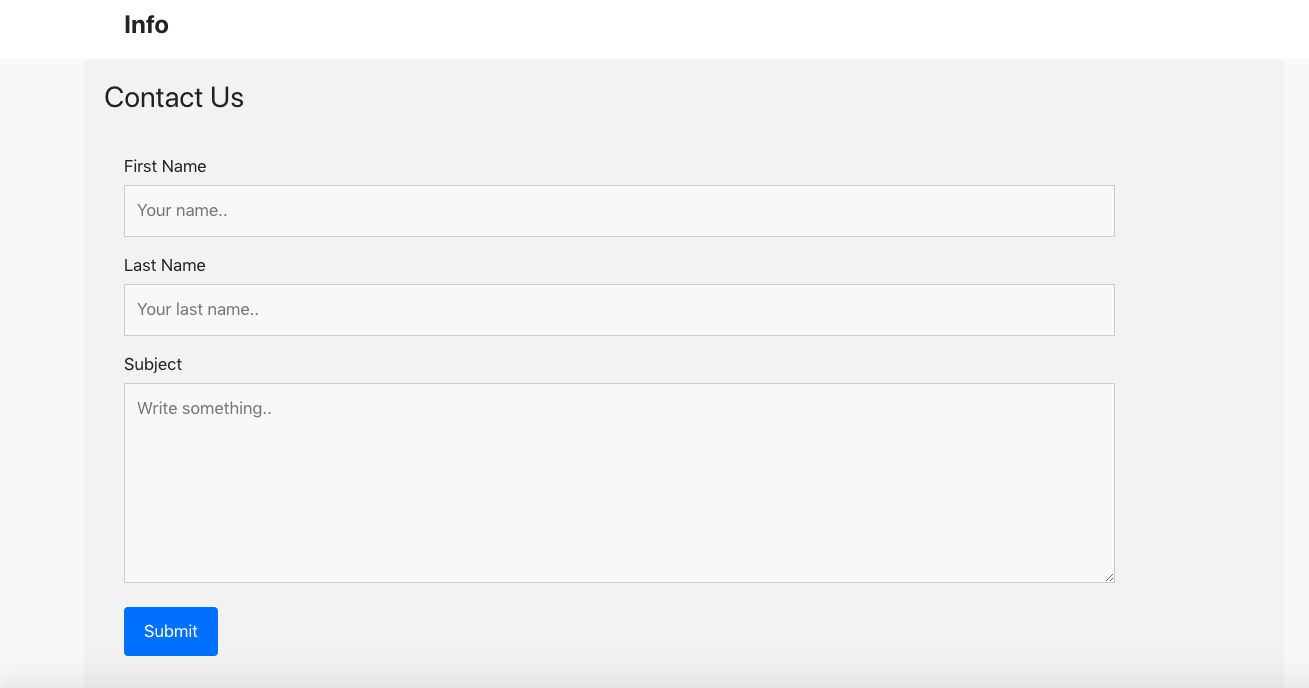
NOTE – If you don’t want sidebar in your template then either comment or remove the get_sidebar(); line.
3. Create a Page and Apply created custom Template
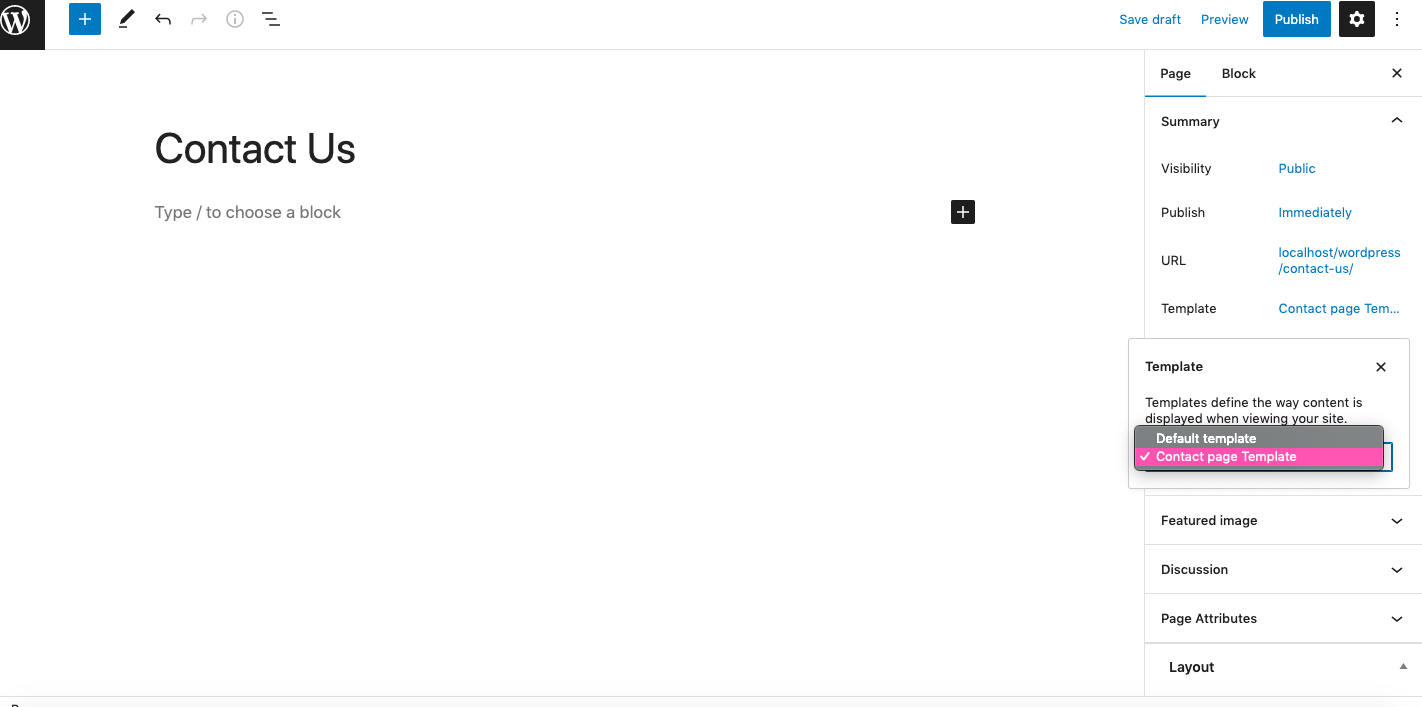
- Login to Admin Dashboard and navigate to Pages->Add new or Edit an existing page.
- Template dropdown list display in
Pagesection. - Select
Contact page Templateoption from the dropdown.
- Preview the page.
Page template with Sidebar –
Page template without sidebar (Removed get_sidebar(); from template file)-
4. Conclusion
It is better to use custom templates if you only want to customize specific pages. You can create separate page-template for multiple pages.
To apply the page template open the existing page or add a new page then select the template name from the page template section dropdown.
If you found this tutorial helpful then don't forget to share.