Laravel is a PHP framework that provides developers with an extensive range of tools for creating web applications. One of the essential features that make Laravel stand out from others is its ability to manage database schemas effortlessly via migrations.
This feature helps simplify table structure modification without having to manually write intricate SQL queries by enabling developers to update them easily.
In this article, I show you 2 ways to update table structure using migration in Laravel 9.

Table of Content
- Database Configuration
- Create Table using Migration
- Method 1 – Refresh Migration
- Method 2 – Update Table Structure without Losing data
- Conclusion
1. Database Configuration
Open .env file and specify database connection details.
DB_CONNECTION=mysql
DB_HOST=127.0.0.1
DB_PORT=3306
DB_DATABASE=tutorial
DB_USERNAME=root
DB_PASSWORD=
2. Create Table using Migration
- Create a new table
Employeesusing migration.
php artisan make:migration create_employees_table
- Now, navigate to
database/migrations/folder from the project root. - Find a PHP file that ends with
create_employees_tableand open it. - Define the table structure in the
up()method.
public function up()
{
    Schema::create('employees', function (Blueprint $table) {
        $table->id();
        $table->string('emp_name');
        $table->string('email');
        $table->string('gender');
        $table->smallInteger('active');
        $table->timestamps();
    });
}
- Run the migration –
php artisan migrate
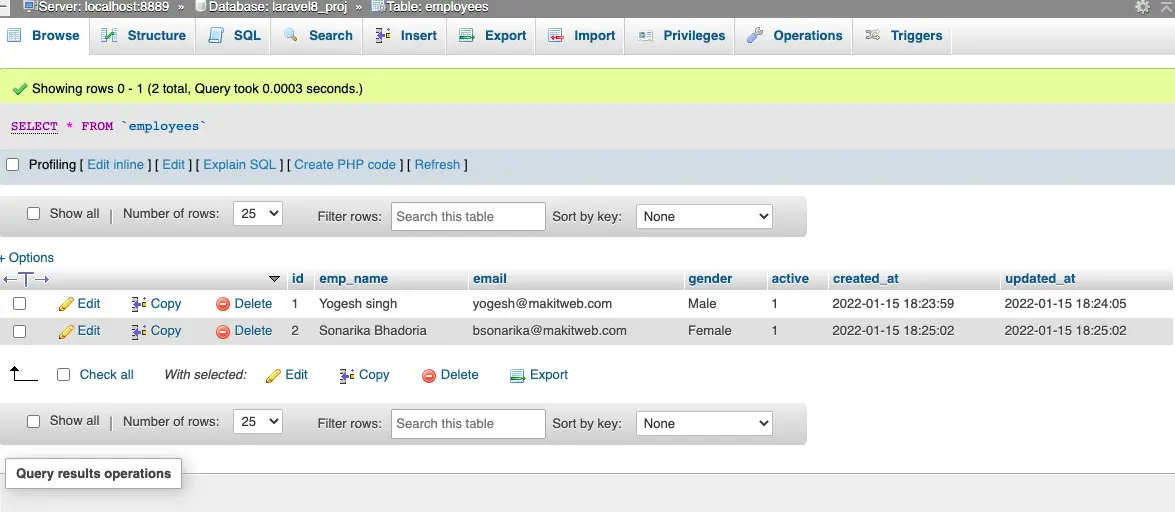
- The table is been created and add some records in it.

3. Method 1 – Refresh Migration
Refreshing migration is the easiest way where you can directly update the existing table structure in migration files but it is also risky because it recreates the whole database and deletes its data.
- Open the
employeesmigration file that was generated in the previous step. You can find it in thedatabase/migrationsfolder of your Laravel project. - Update the table structure in the
up()method.
public function up()
{
      Schema::create('employees', function (Blueprint $table) {
             $table->id();
             $table->string('emp_name',80);
             $table->string('email',80);
             $table->string('gender',10);
             $table->smallInteger('status');
             $table->timestamps();
      });
}
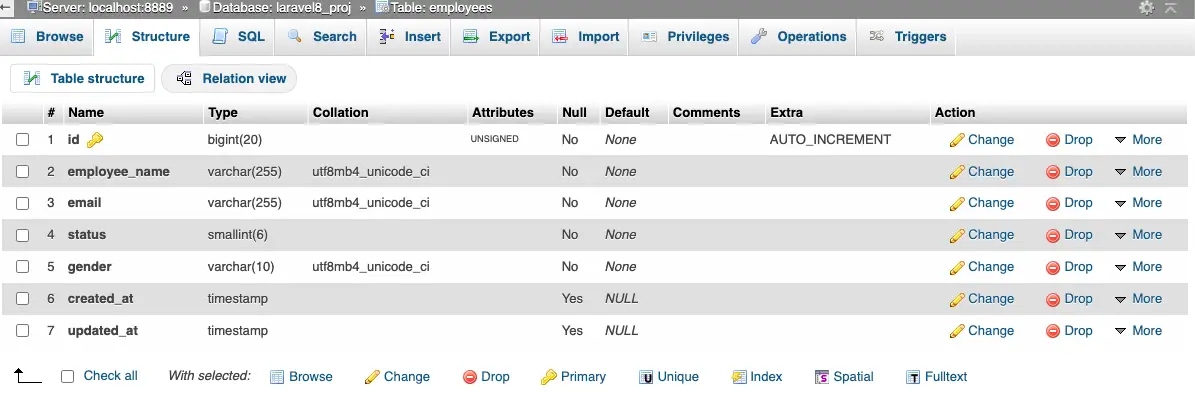
- Here, I did the following changes –
- Set the string datatypes field length.
- Added a new column
status, and - Delete
activecolumn.
- Refresh the migration –
php artisan migrate:refresh

- Or, you can re-migrate a specific number of migrations from last –
php artisan migrate:refresh --step=2
- The above command only roll back and re-migrate the last two migrations.
4. Method 2 – Update Table Structure without Losing data
To update the existing table structure while retaining its data, a new migration file will be created through this method. By using migrations to modify the table structure, you can ensure that none of the existing data is lost or deleted in the process.
Require doctrine/dbal package to modify existing columns –
composer require doctrine/dbal
Create migration file –
php artisan make:migration update_and_addstatus_to_employees_table
- Open the newly created migration file. You can find it in
database/migrations/folder. - Inside the
up()method, you can define the changes you want to make to the table structure.
public function up()
{
       Schema::table('employees', function (Blueprint $table) {
               $table->renameColumn('emp_name', 'employee_name');// Renaming "emp_name" to "employee_name"
               $table->string('gender',10)->change(); // Change Datatype length
               $table->dropColumn('active'); // Remove "active" field
               $table->smallInteger('status')->after('email'); // Add "status" column
       });
}
- Here, I did the following changes –
- Rename
emp_namecolumn name toemployee_name. - Changed
gendercolumn Datatype length. - Delete
activecolumn. - Add a new
statuscolumn.
- Rename
- In
down()method –
public function down()
{
        Schema::table('employees', function (Blueprint $table) {
               $table->renameColumn('employee_name', 'emp_name');
               $table->string('gender')->change();
               $table->smallInteger('active');
               $table->dropColumn('status');
        });
}
Run the migration –
php artisan migrate
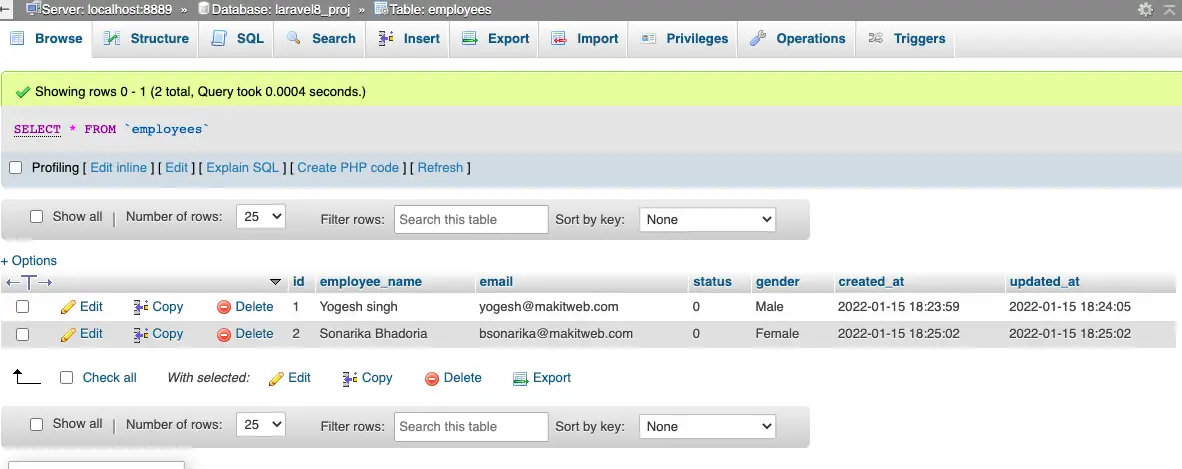
Output –
- Table structure will be updated without losing data.


These steps ensure a smooth data table update using Laravel’s migration system. Your data integrity is preserved and there are no worries about potential losses. The migration feature guarantees a flawless transition with ease.
5. Conclusion
Performing table structure updates is a standard task in web development initiatives. With the aid of Laravel’s migration function, this process becomes more controllable and maintainable. By using the method mentioned in this article, you can effectively update your table structure using migrations in Laravel.
Migrations not only streamline the method but also guarantee that your database remains synchronized with your codebase, making it more feasible to collaborate with other programmers while maintaining data coherence throughout your application.
If you found this tutorial helpful then don't forget to share.