Sometimes it requires to quickly create a clone of the MySQL database while working on the project either for the backup purpose, using it on a copy of the project, or moving the project.
With phpMyAdmin, this process is easier.
In this tutorial, I am assuming that you already have a cPanel enabled web hosting server.

Contents
1. Directly from phpMyAdmin
- Login to your cPanel and open phpMyAdmin.

- Select the database in which you want to create a copy.
- Click on the
Operations. - Now enter the new database name in
Copy database tosection and set the radio button toStructure and data.
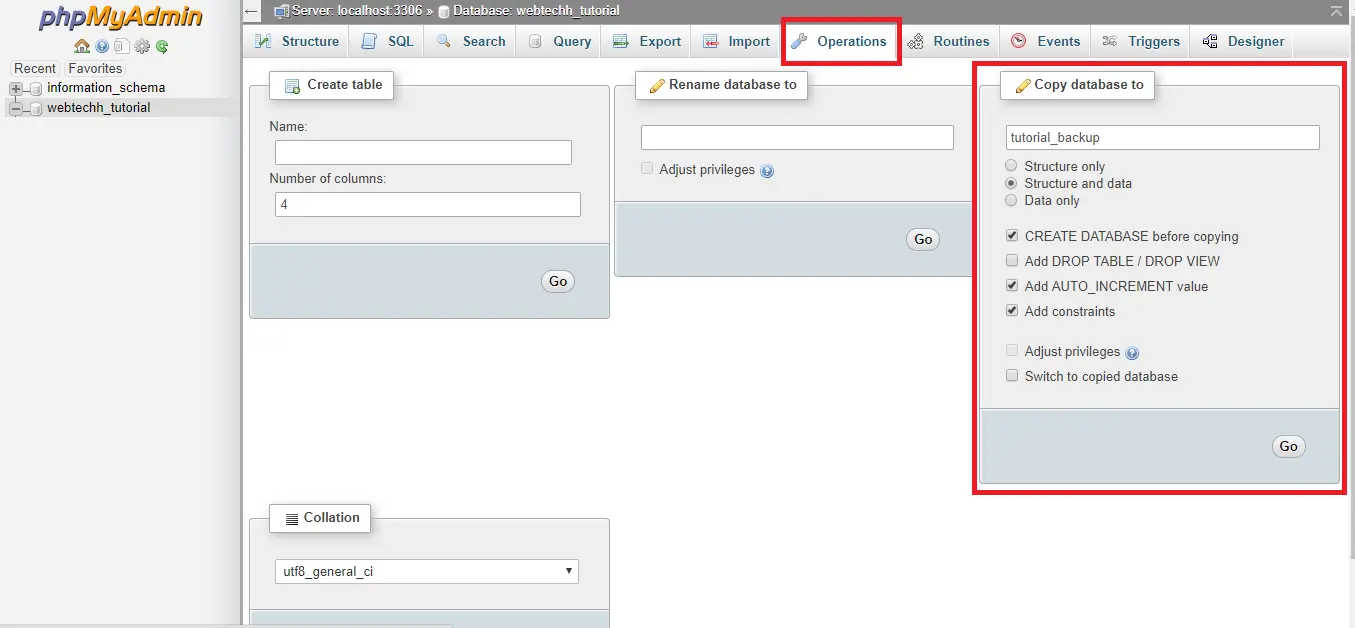
- Click on the
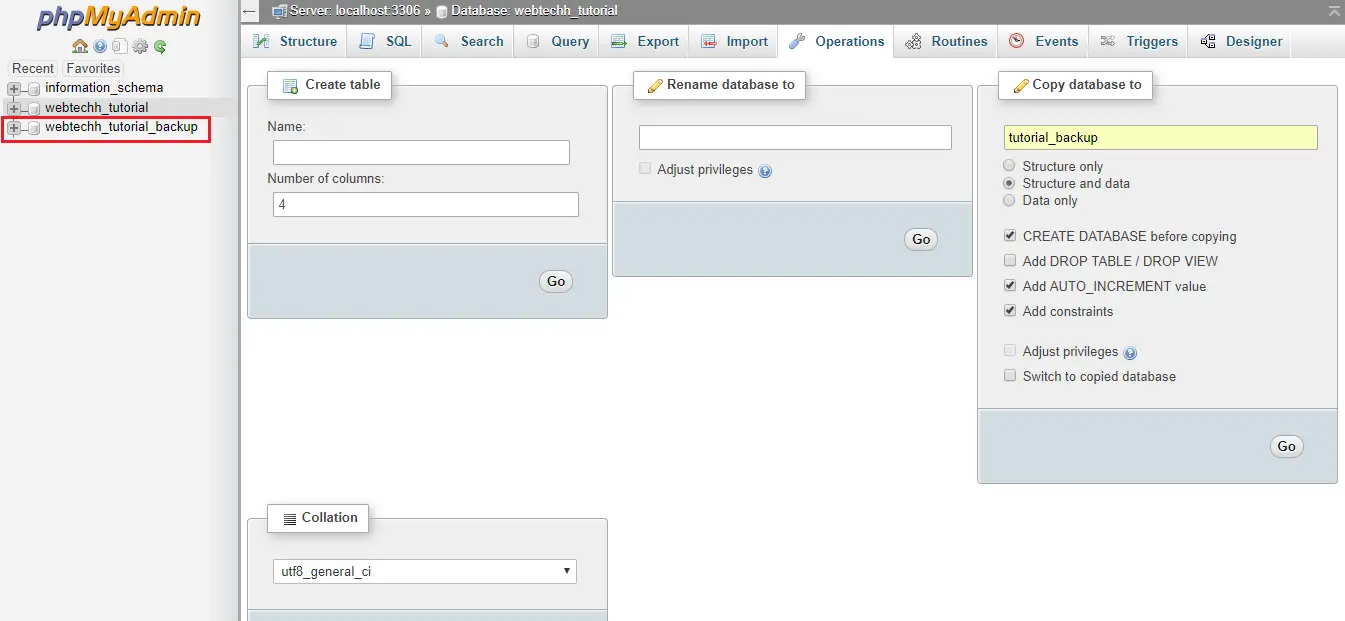
Gobutton. - A new database is been created.
2. Export and Import
There are the following steps –
Export Database
- Open phpMyAdmin.
- Select your Database which you want to create a clone.
- Click on the
Exportand select the format to SQL and click on theGobutton.

- Now need to create a new MySQL database for data import.
Create Database
- Navigate to your cPanel home and click on
MySQL databasesunderDatabases.

- Enter the name of the database and click on the
Create Databasebutton.

Create a User
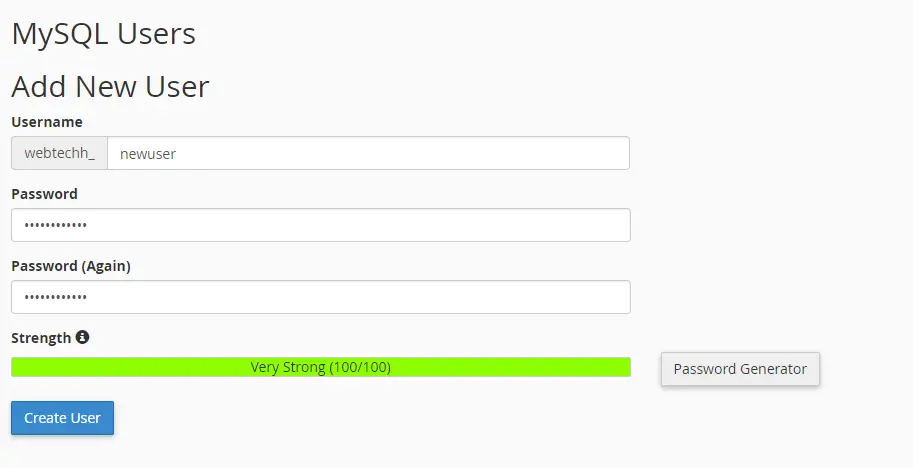
- Navigate to Add New User Section.
- Enter the username and password and click on the
Create Userbutton.
Assign the user to the database
- Navigate to Add User To Database.
- Here, select your created user and Database from the drop-down.
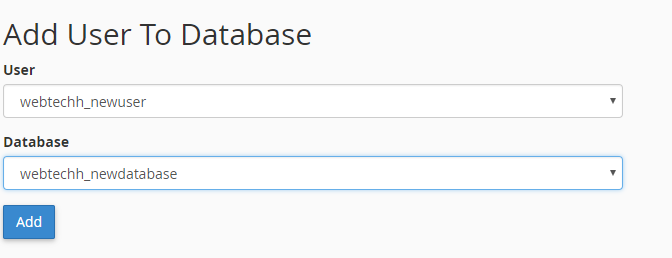
- Click on the
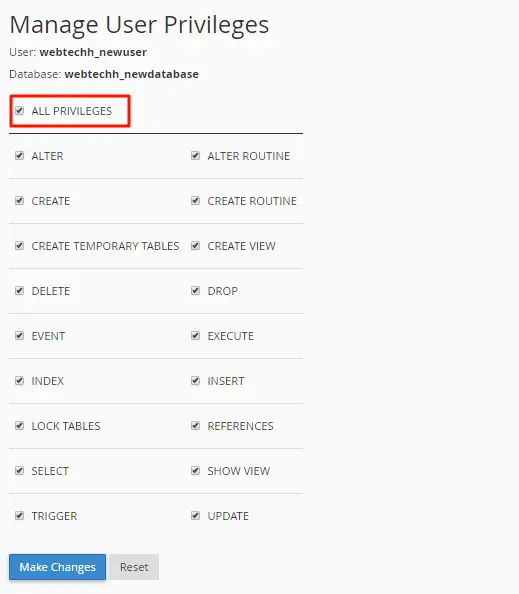
Addbutton. - You will be taken to the Manage User Privilege section. Here, check the
All Privilegescheckbox and click onMake Changesbutton.
Import SQL file
- Open phpMyAdmin and select the newly created database.
- Click on the
Import. - Choose the exported SQL file and click on the
Gobutton.
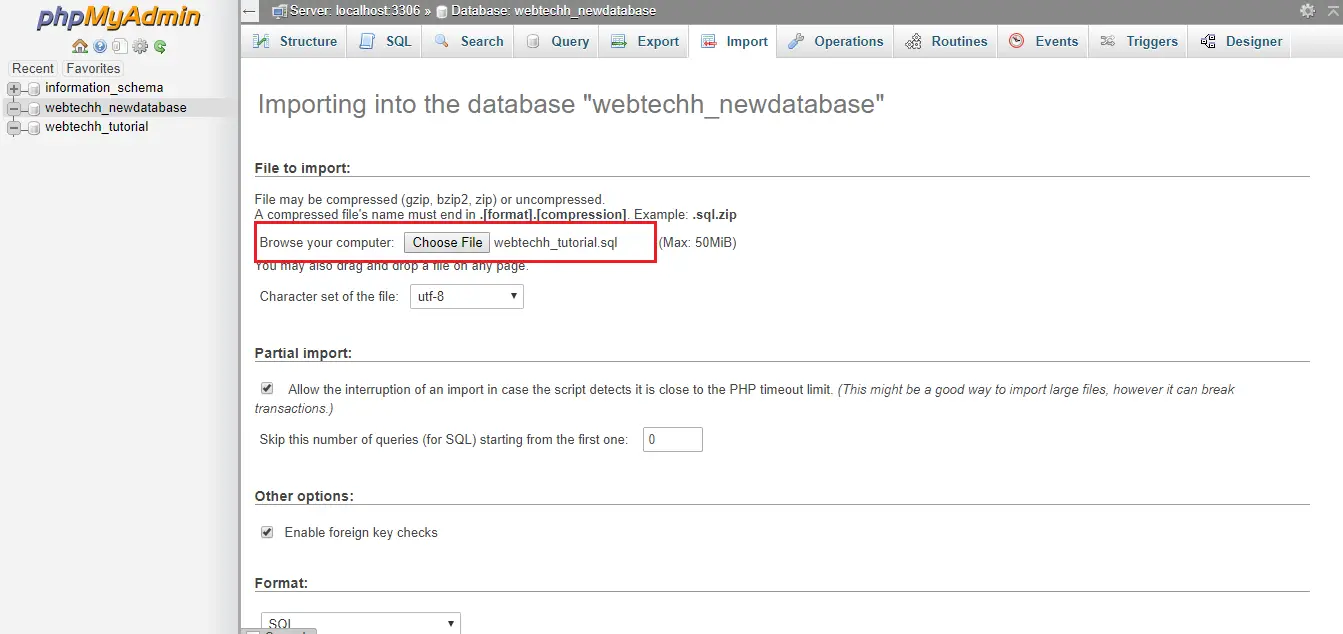
- You will see a success message after successfully importing.
3. Conclusion
Follow any of the above methods to create a duplicate of the selected MySQL database either on the server or local system.
If you found this tutorial helpful then don't forget to share.